
DIY Fire Starters
- Connie Byers

- Dec 23, 2022
- 3 min read
Updated: Jul 7, 2024
This year, we’ve started a new tradition of giving only handmade gifts to family and friends. We have a large family, and in years past Christmas was an extravaganza of gift giving and receiving.
But somewhere along the way, we began to realize that none of that was actually bringing any of us joy, and in fact, was causing more trouble than needed. Not only did it cost each of us a fortune every year, but 75% of it was simply being placed in boxes and stored away. After all, one can only fit so many novelty mugs and cute dish towels into a home before everything else just becomes excess.
We all realized at about the same moment that we in fact each owned all the things we wanted and didn’t really have room in our homes for more. But we didn’t want to completely take away the fun of presents so each person on our list is getting simple small and thoughtful handmade gifts.
Luckily, everyone we know uses a wood-burning stove as a primary heat source which made picking a gifting theme easy! And, these little DIY fire starters are as practical as they are cute. So, it’s a win, win! They only take a few minutes and a few basic supplies to make and they will literally warm the hearts (and butts) of their recipients!
DIY Fire Starter Supplies
Heavy pot
Small Disposable Glass or Metal Container (I used an old jar, but I’ve also used a tin can before)
Muffin Tin
Muffin Tin Liners
Pot Holder
Small Pinecones
Pine or Spruce Tips
Cinnamon Sticks
Dehydrated Oranges
Candle Wax, (I had a random box of tea candles I wasn’t planning on using, so I chose those but you could also use leftover candle bits for this project.)
DIY Fire Starter Instructions
This is a quick and easy project, so let’s dive in!

STEP 1.
Start by lining your muffin tin with muffin liners.

STEP 2.
Next, place your wax into a small glass or metal container. (Note, that you probably won’t be able to use the container again so pick something disposable or purchase a small pot specifically for wax projects.)
Then, place the container in a heavy pot with enough water to fill approximately ½ way up the side of the small container. Too much water and it will bubble into your wax when it starts to boil so be sure to keep the waterline well below the top. Watch carefully, and boil until all of your wax has melted.
STEP 3.
Carefully remove the inner melted wax container since I used an old canning jar for this, I was able to use a regular jar lifter for this. If you are using a tin can, you could add a wire to the can to create a handle before you start melting.

STEP 4.
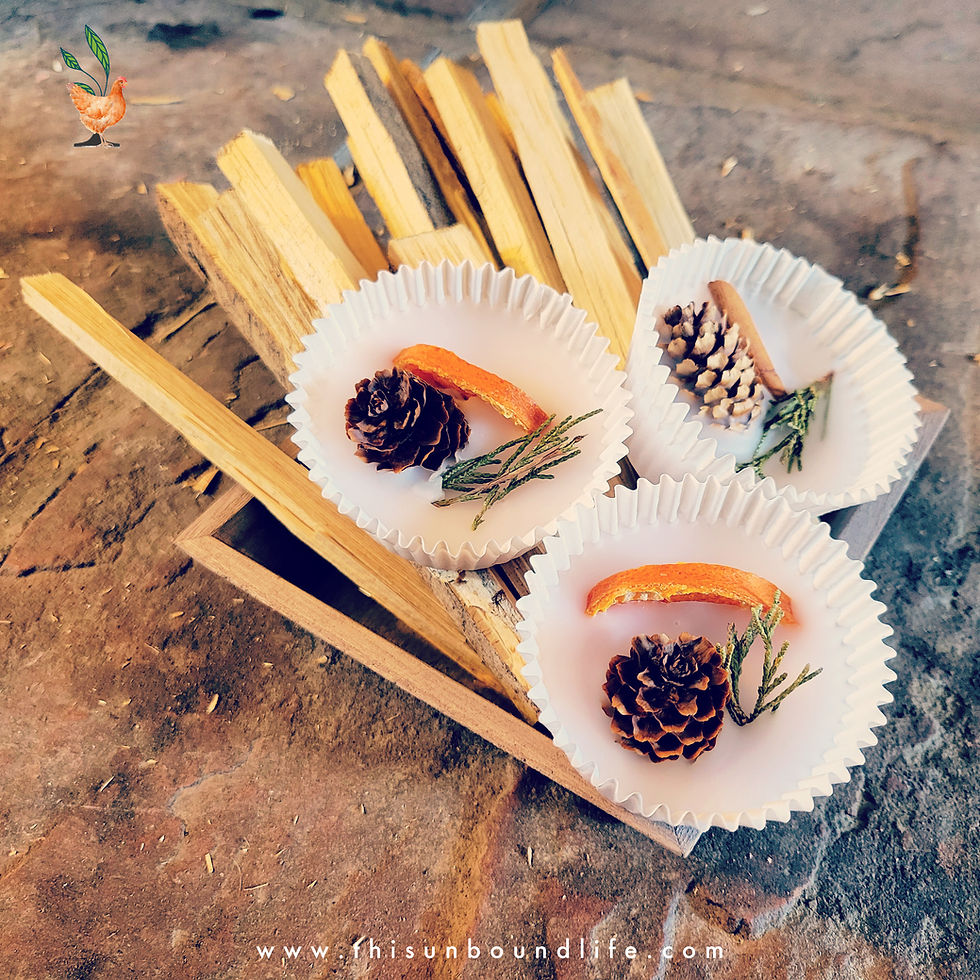
Fill your muffin liner cups approximately ½ way full with melted wax then ad your small pinecones and pine tips, cinnamon sticks, or orange slices.

STEP 5.
Allow your fire starters to cool completely on the counter, or you can place them in the fridge for a quicker cooling time. Once they are completely cooled, you can opt to remove the muffin liner or leave it in place. I removed ours so that they would fit nicely into the jar I used for packaging, but you can do it either way.
And, that’s it. It couldn't be simpler to create cute little DIY fire starters to give as gifts or keep for yourself. This year we will be gifting these alongside our DIY Firewood totes (find the tutorial here.)
What do you have on your DIY gift-giving project list this year?? Tell us all about it in the comments below. If you make these be sure to share your pictures with us by tagging them on Instagram @thisunboundlife.blog We hope that you have a happy healthy and thrifty holiday season, and, as always, until next time:


Comments